Client Portal Instructions
These instrutions are written in seperate sections so they can easily be referred back to for each section. However, it will be easier to work through each module in the following order:
- Create a new Client Portal using the "creating a new portal instructions". See: Creating a new portal
- Open a copy of the portal to view the client side as you make further adjustments.See: Creating a new portal
- Once the new client portal has been created, follow the below instructions in order:
- Select the first module
- Change the title (if neccessry)See: Basic Module Adjustments
- Add a Client Side Date in the description box (if neccessary)See: Change module dates
- Change the module icon (if neccessary)See: Basic Module Adjustments
- Attach documents to the module under the "Module Type" section by selecting the option "Links" and adding the file links dropbox. If there are no files to be added to a module, select the URL option instead.See: Attach documents to a module
- Add a due date (reminders for project managers) - (if neccessary)See: Change module dates
- Select the appropriate module statusSee: Change module status to Inactive/Active/Completed
- Click "Update" and move onto the next module.
- Once the portal is ready, create a new user profile.See: Create a new user profile
- Once the user profile is created, attach the user(s) to the project.See: Assign users to a project
- Create the project
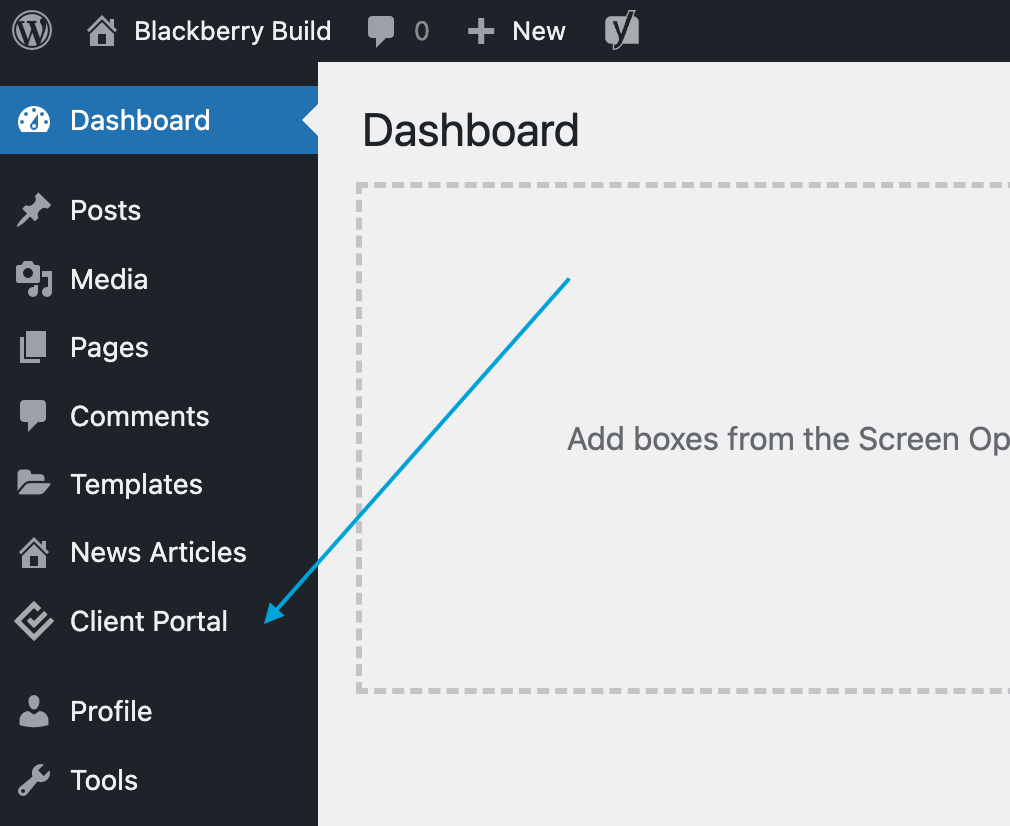
- On the left-hand side menu click Client Portal.
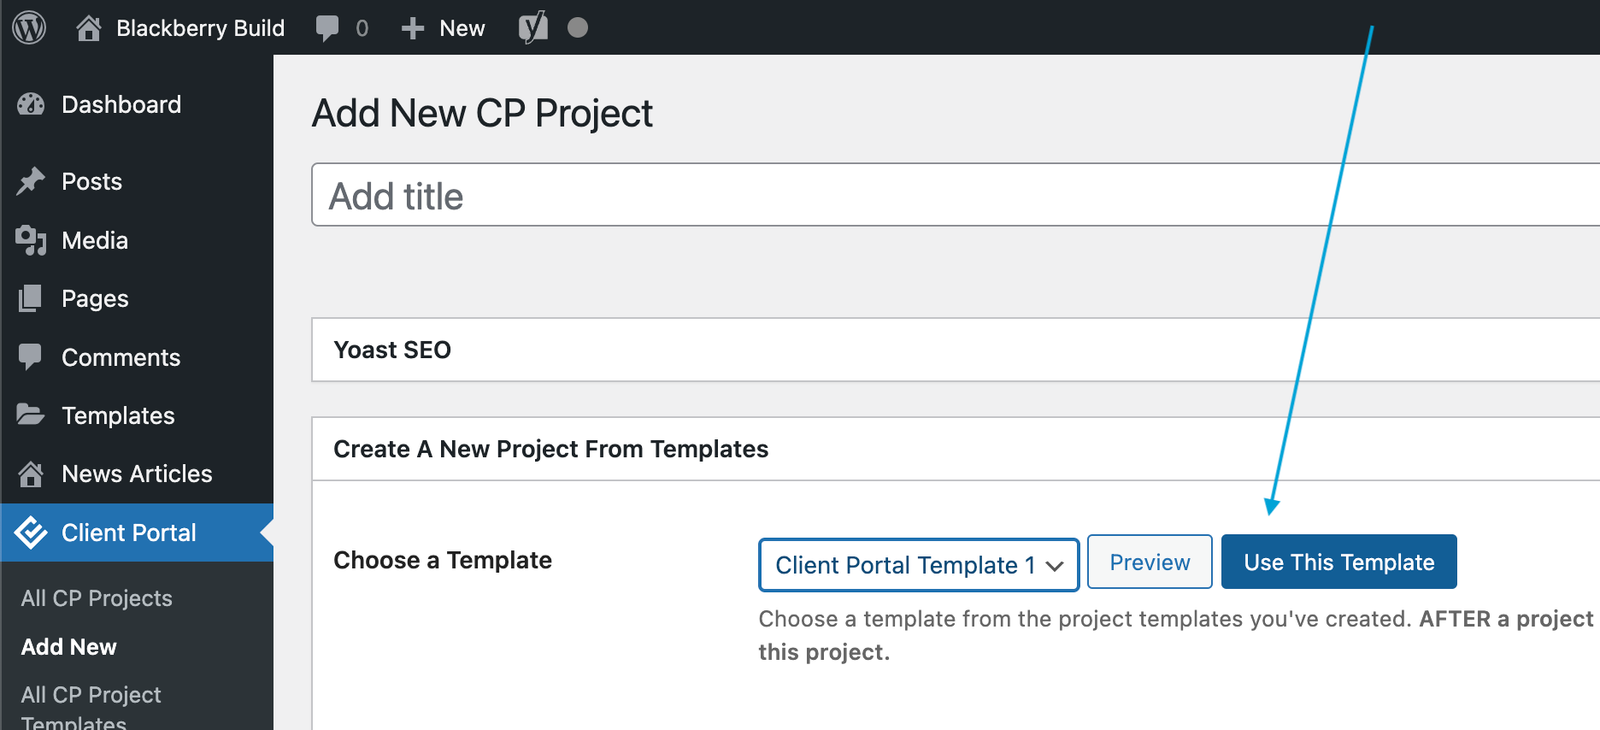
- Click Add New.

- Add a project title

- Choose a template (Client Portal Template 1)
- Click Use This Template
- On the left-hand side menu click Client Portal.
- Customise the project
- (Optional) Next to Permalink click Edit and type your preferred permalink > Click OK.

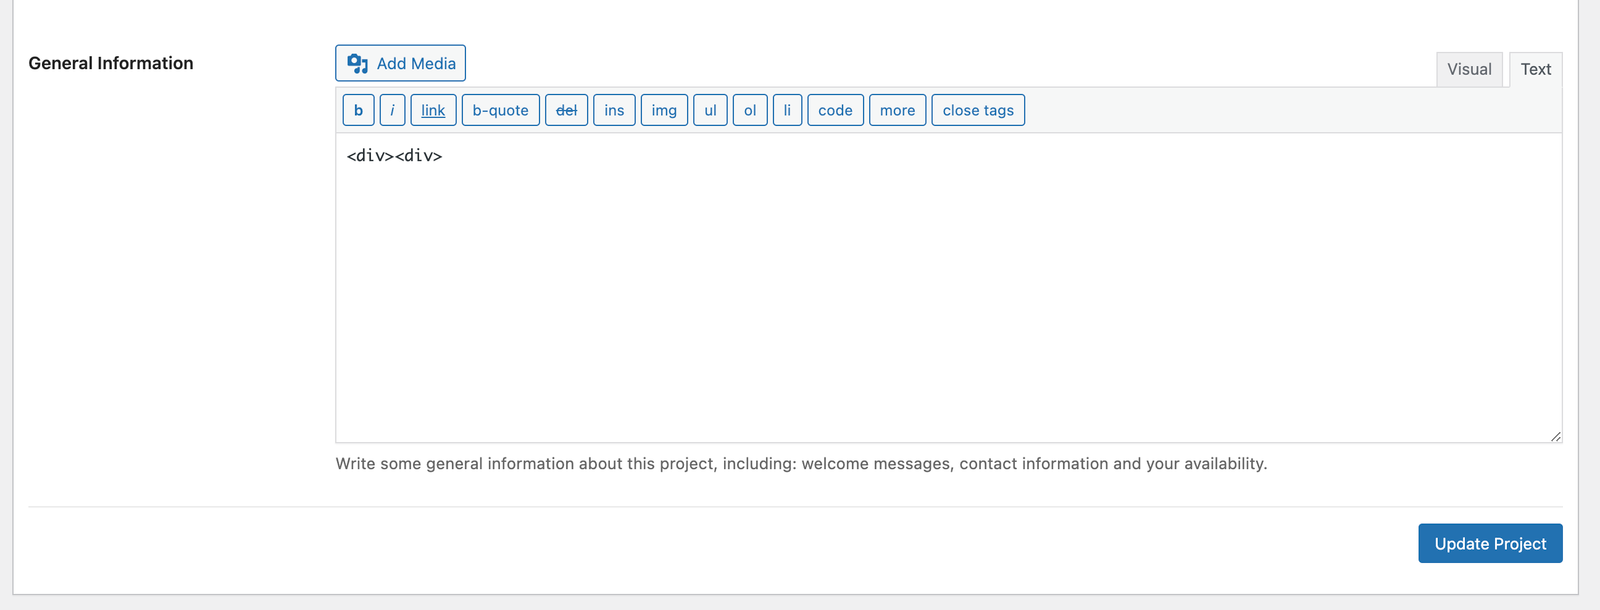
- Under the Custom Branding Tab, scroll down to General Information.
- Scroll down to the code generator.
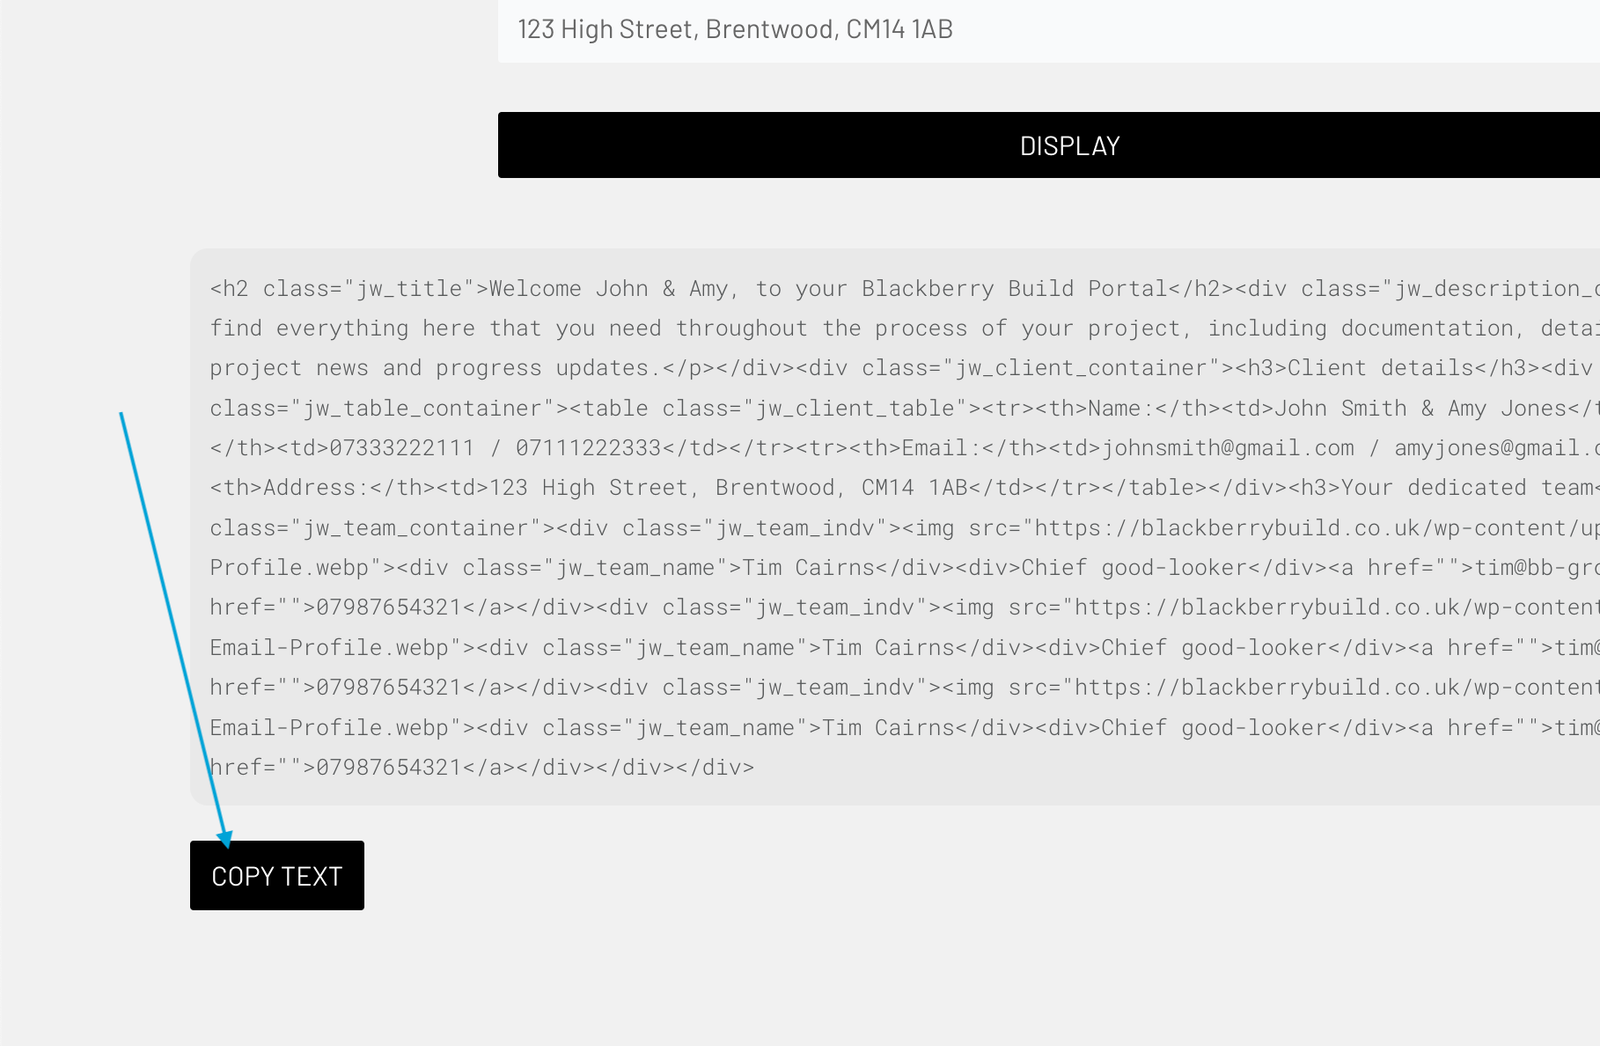
- Fill out the information and click Display.
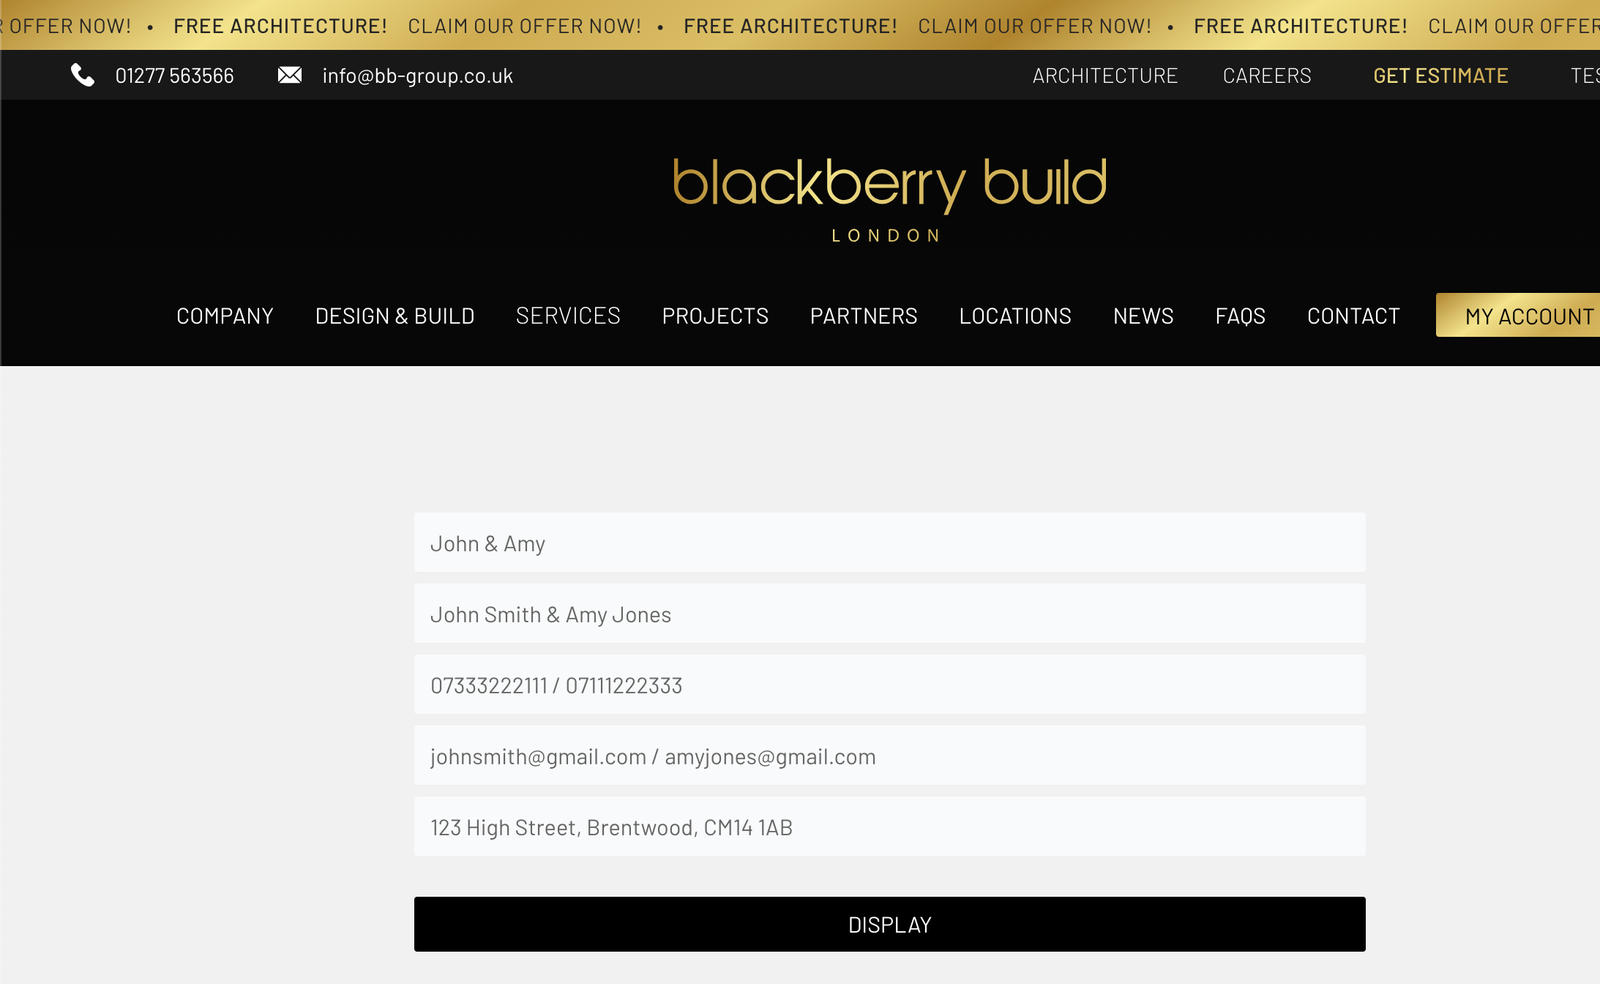
- Click Copy Text
- Go back to the general information section and click Text (top right)

- Paste the code into the general information area.
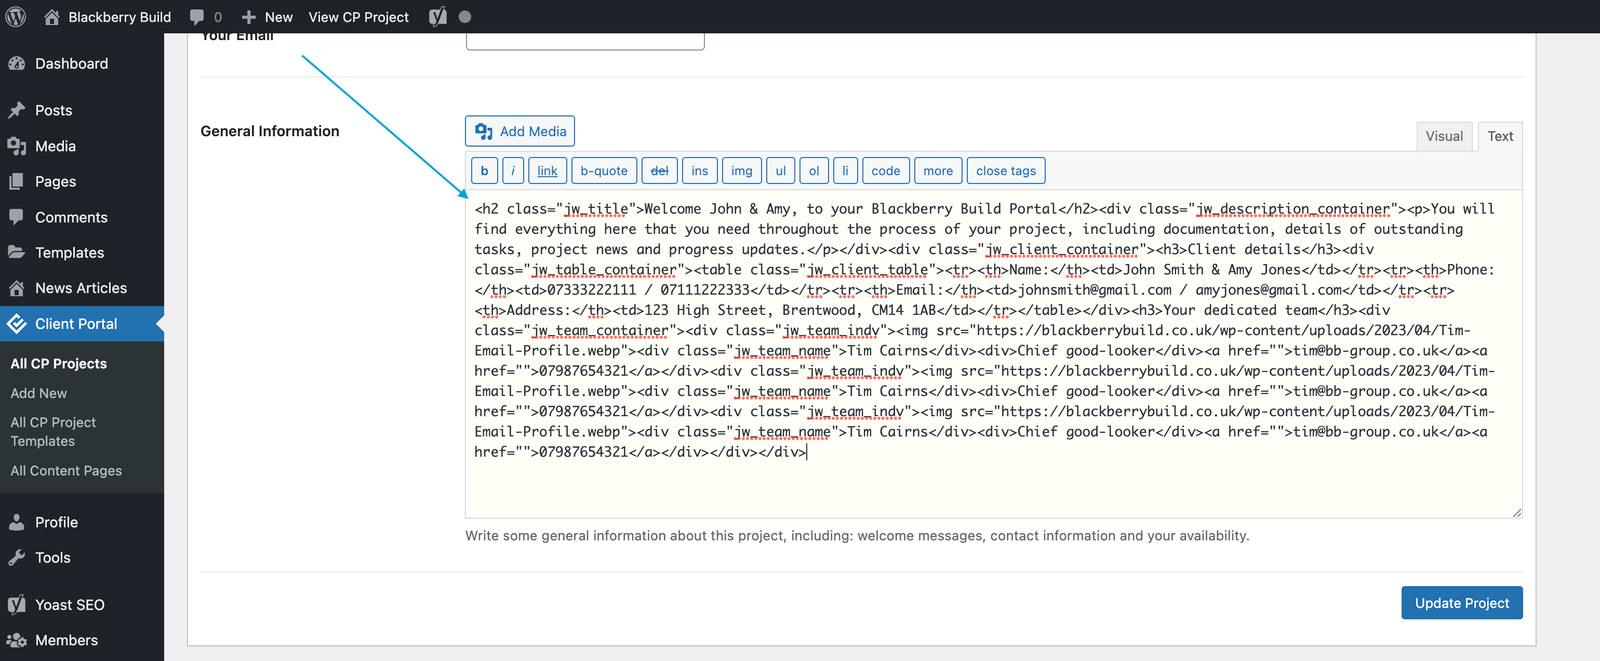
- Click Update Project.
- (Optional) Next to Permalink click Edit and type your preferred permalink > Click OK.
- Open the client portal you wish to see. For instructions on how to do this follow steps "Open a Client Portal" and continue below:
- Right click the permalink and choose "Open in new tab"
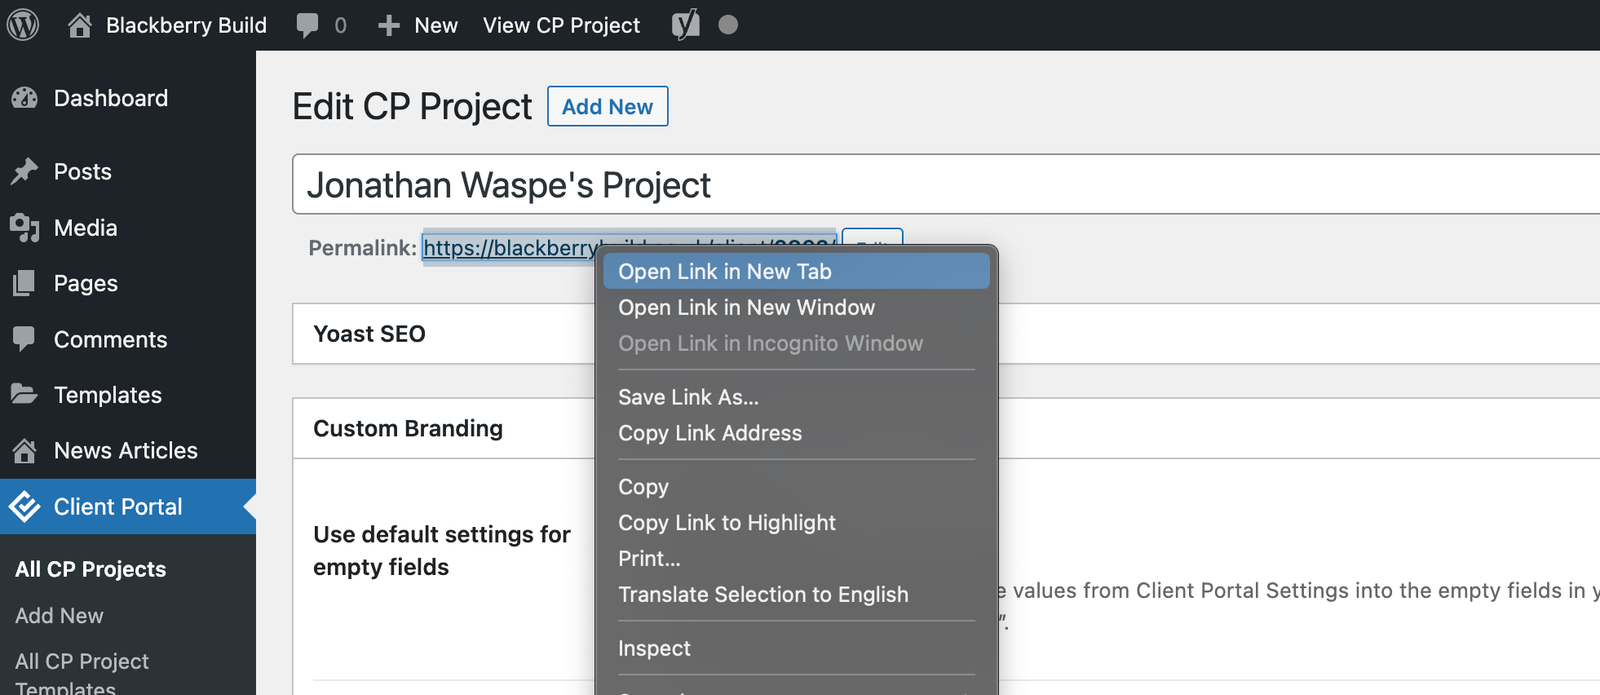 The front-end view of the portal will now be open in a new tab and will update everytime you update the client portal from the back-end.
- Right click the permalink and choose "Open in new tab"
-
- On the left-hand side menu click Client Portal.

- Choose the project portal you wish to edit.
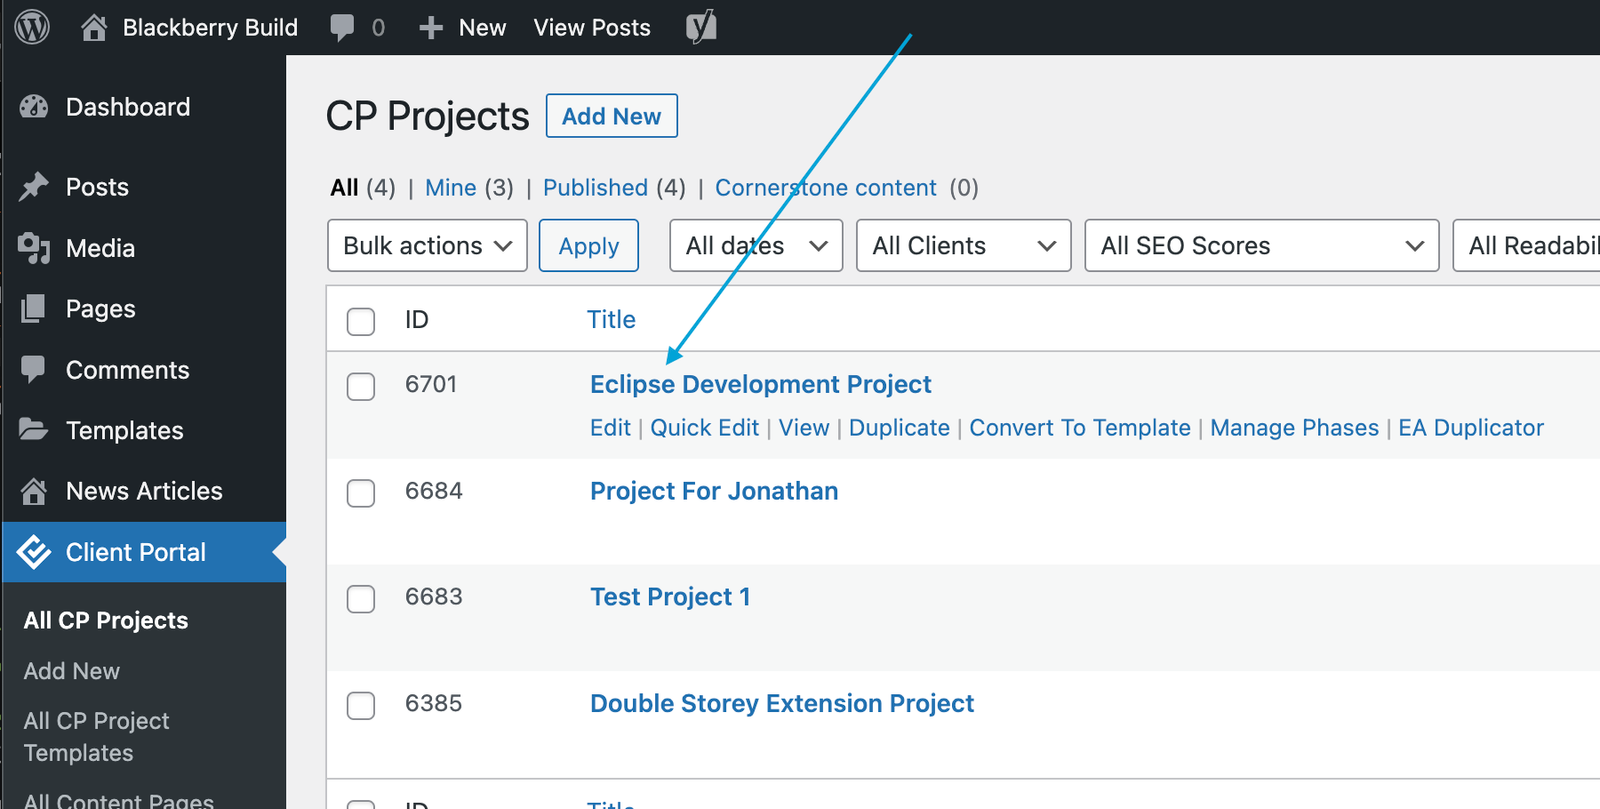
- On the left-hand side menu click Client Portal.
- Follow steps "Open a Client Portal" and continue below:
- On the client portal page, scroll down to the correct phase and module.
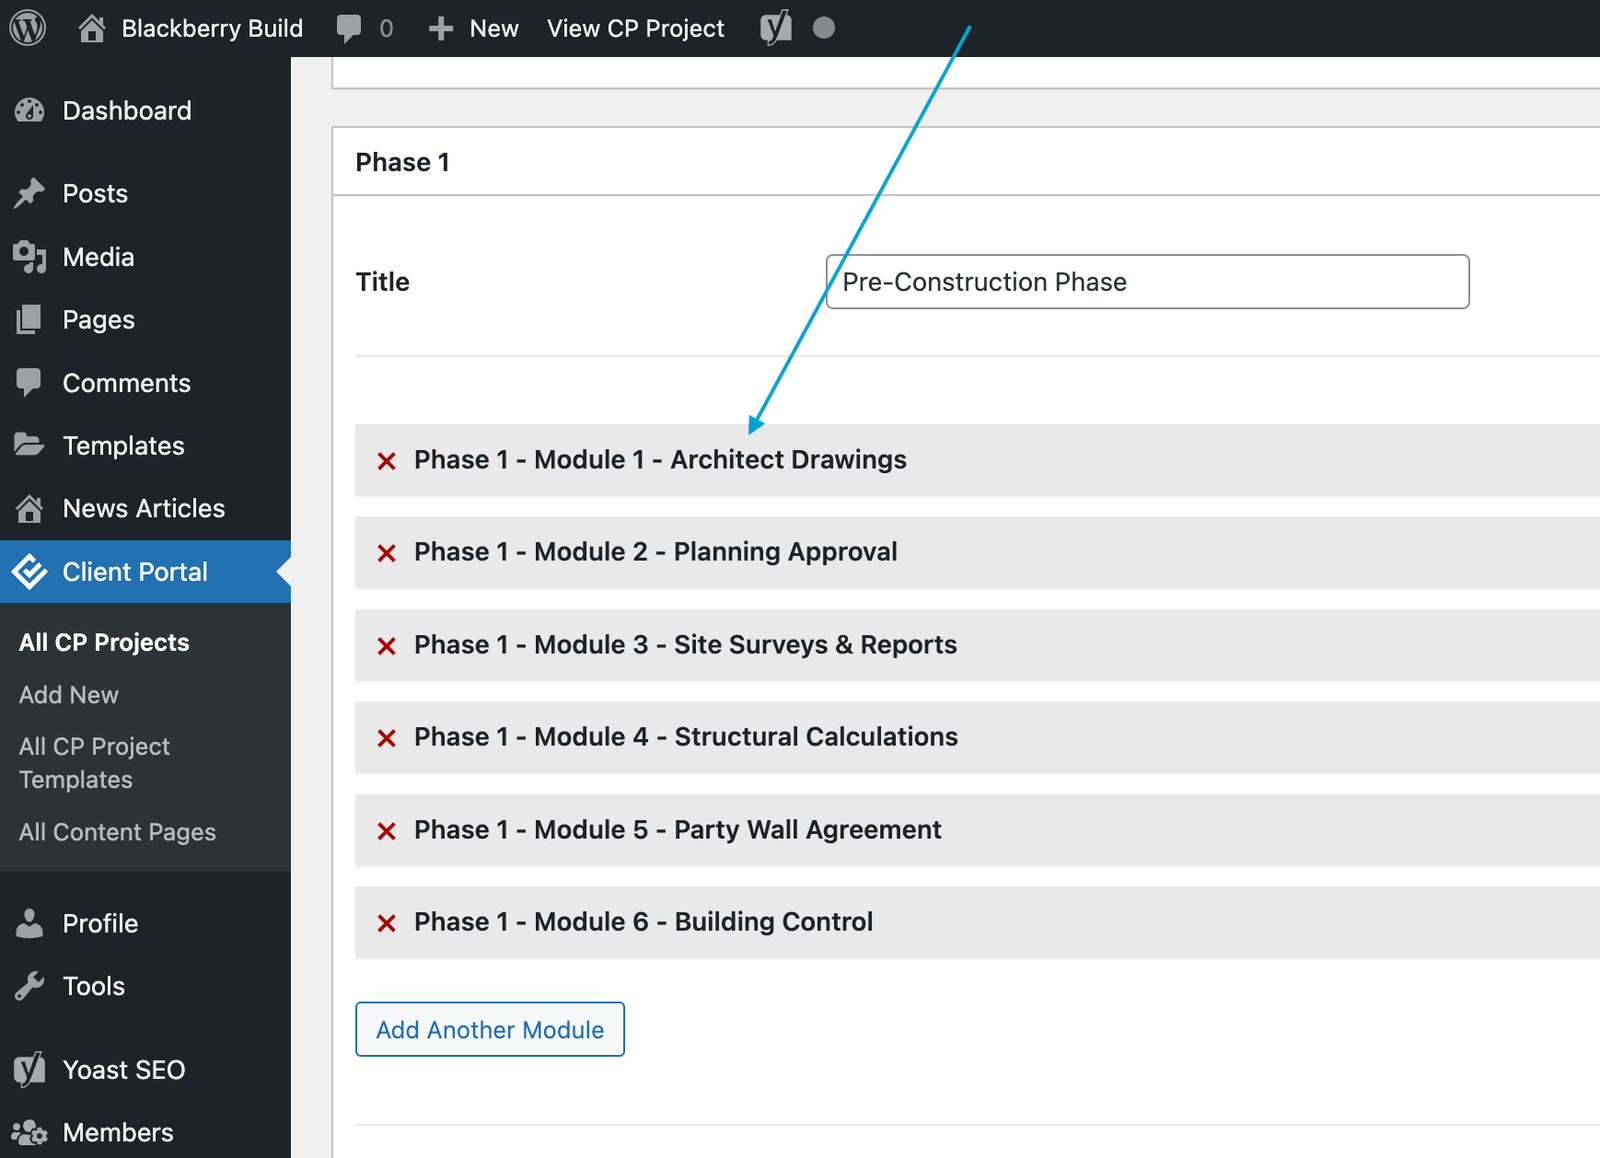
- Click the module to open it and make the neccessary changes to the title, description or icon.
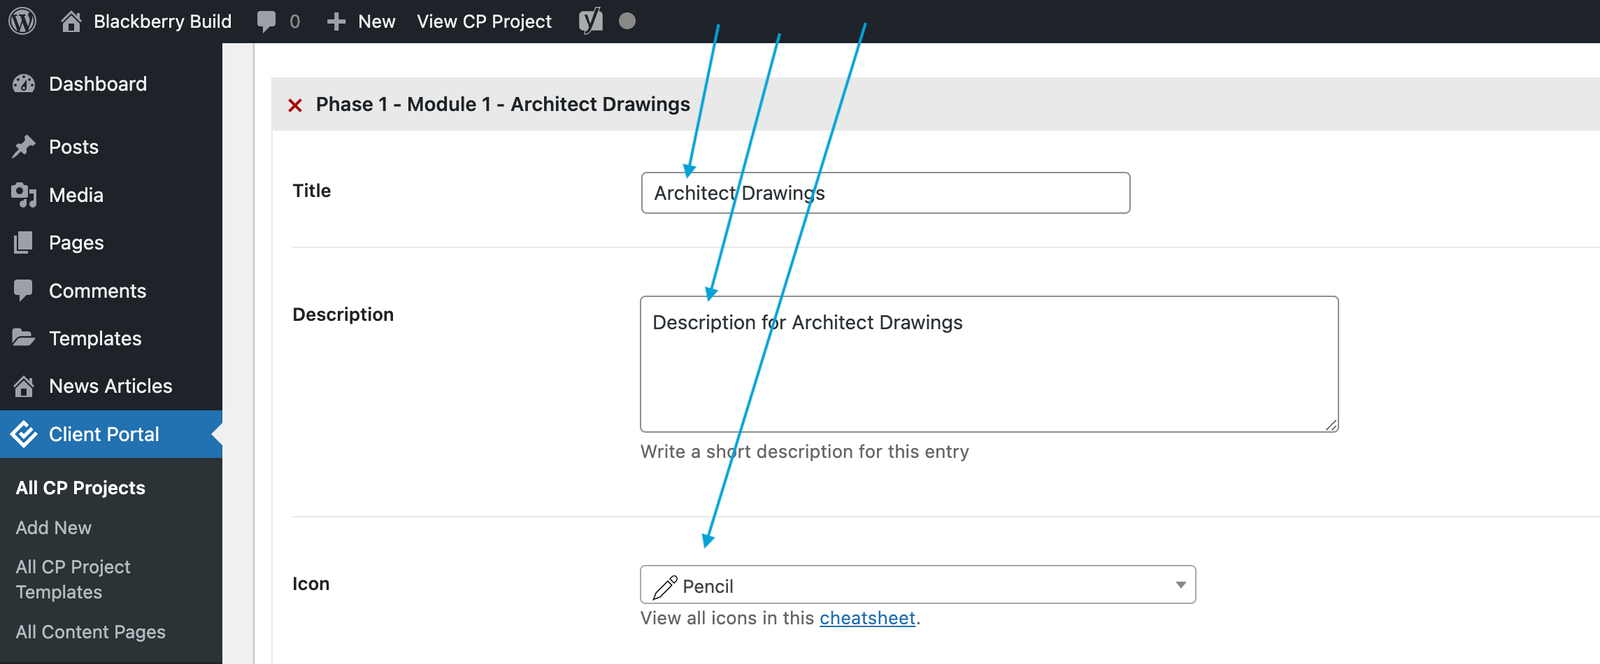
- Scroll up to the top and click Update.

- On the client portal page, scroll down to the correct phase and module.
-
Note: There are two types of dates for each module. The client side date is the date in the description (the copied line of code). It is a visual date that the client sees and does not link to anything. The "due date" is for the project managers and will send an e-mail reminder 1 day before the module becomes due (the clients cannot see this date).
Client side date
- The client side date will show in the modules on the front end. The clients will be able to see this.

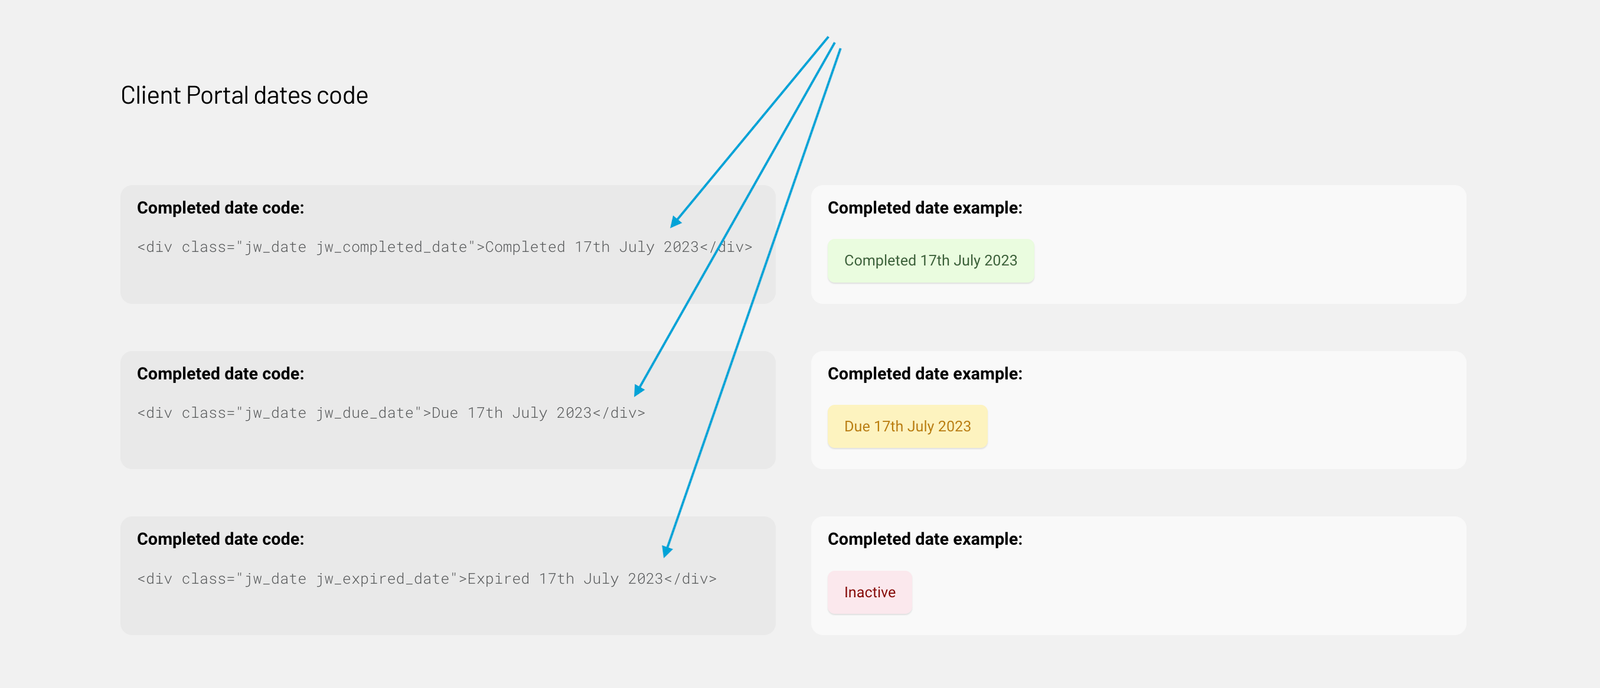
- You can add these dates by copying the short line of code at the bottom of these instructions into the description box of the module. You'll need to copy the correct line depedning on whether you want the date colour to be green, amber or red.
- Paste the date into the description box of each module.
- Scroll up to the top and click Update.

Project manager dates (to set reminders)- The reminder date will not be visible by the client but instead triggers an email reminder 1 day before the module becomes due. You can add these dates in the "due date" section of each module.
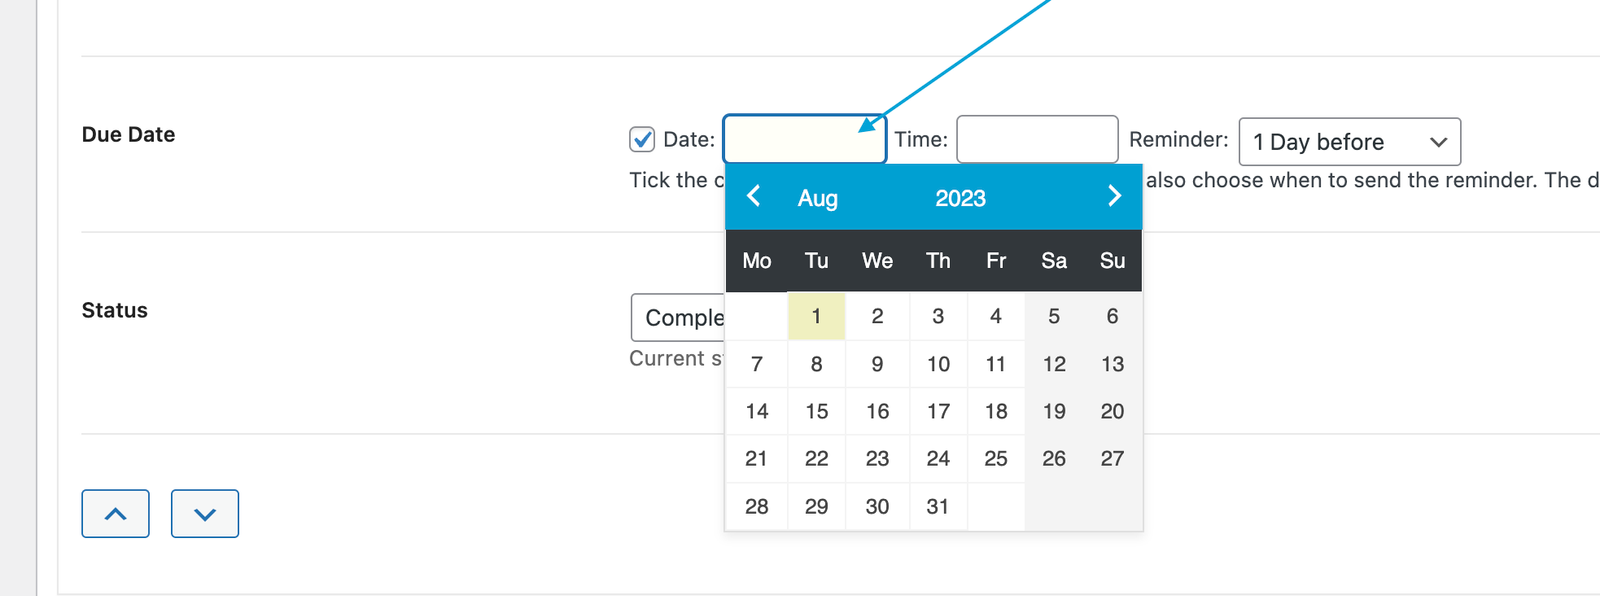
- Scroll up to the top and click Update.

- The client side date will show in the modules on the front end. The clients will be able to see this.
-
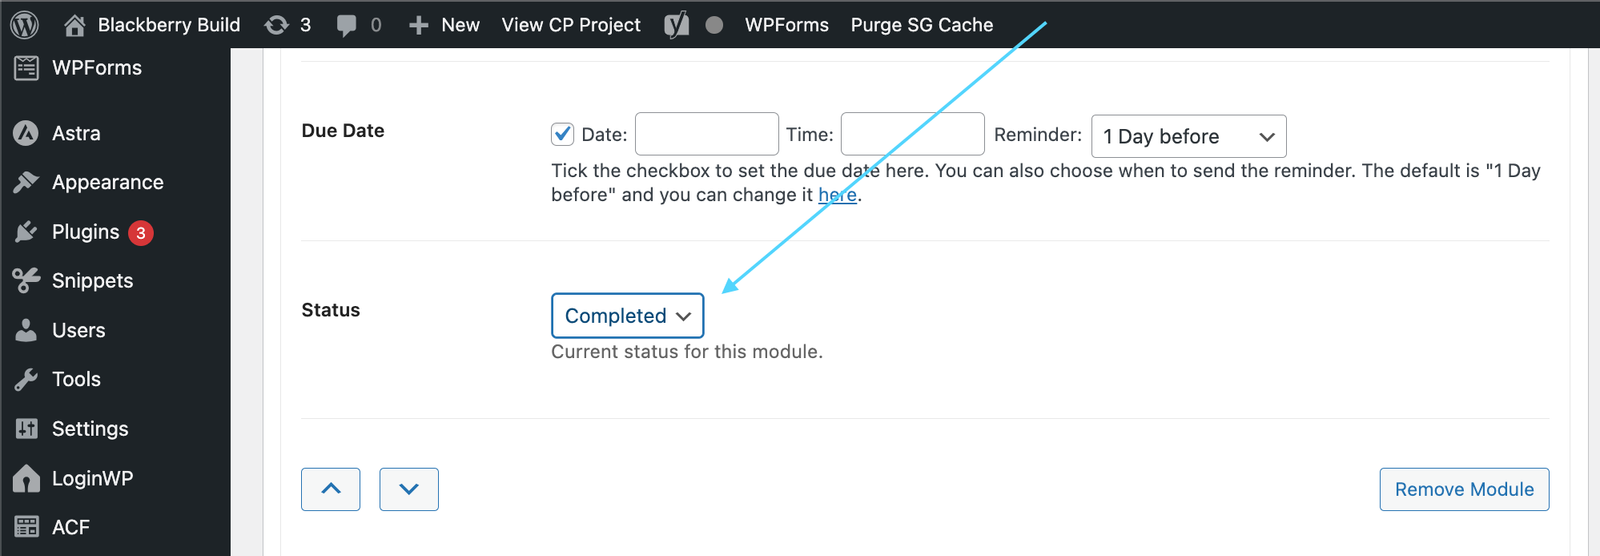
Note: When a module status gets changed to Active or Complete, the client will recieve an e-mail notification. You will be presented with an alert asking if you want this to be witheld eveytime you changes the status from the client portal back end.
Follow steps "Open a Client Portal" and continue below:
- On the client portal page, scroll down to the correct phase and module.

- Scroll down to the due date and input the due date and time.

- Scroll up to the top and click Update.

- On the client portal page, scroll down to the correct phase and module.
- Follow steps "Open a Client Portal" and continue below:
- On the client portal page, scroll down to the correct phase and module.

- Scroll down to the Module Type and select Link. Add the link URL and Document title.

- To add additional documents, click Add Link and repeat previous step.

- Scroll up to the top and click Update.

- On the client portal page, scroll down to the correct phase and module.
-
Note: In order to create a new user profile, you'll need to log out, therefore the instructions on the website will not be available. You can open an incognito tab (Ctrl + Shift + N), or complete this in a different browser whilst remaining logged in.
- If you need to log out you can do so by clicking the below button.
Log out - Go to the user registration page by copying the below link into a new tab/broswer. https://blackberrybuild.co.uk/register
- Complete the user registration details and click Register.

- The new user is now registered. To assign the user to a project, follow the next steps.

- If you need to log out you can do so by clicking the below button.
-
Note: To assign a user to a portal, you will first need to register the user following the above steps.
- On the left-hand side menu click Client Portal.

- Choose the project portal you wish to assign users to.

- In the project information tab scroll down to Client Accounts.
- Click the field next to Client Accounts and select the user you wish to assign to the project.
 Repeat the above process to add as many users as you need.
- Once all users have been addded, click Update Project.

- Each user will automatically receive an email allowing them to reset their password and access their portal.
If the user does not receive a link to their e-mail, please ask them to check their spam folder, or send them the below link. https://blackberrybuild.co.uk/set-password
- On the left-hand side menu click Client Portal.
Client Portal dates code
Completed date code:
<div class="jw_date jw_completed_date">Completed 17th July 2023</div>
Completed date example:
Completed 17th July 2023
Completed date code:
<div class="jw_date jw_due_date">Due 17th July 2023</div>
Completed date example:
Due 17th July 2023
Completed date code:
<div class="jw_date jw_expired_date">Expired 17th July 2023</div>
Completed date example:
Inactive


